Monday Made It: August 15, 2016

Hi guys! I'm linking up with Tara from 4th Grade Frolics for her Monday Made It linky to share some things I made this week!


Desk Organizer


Now I don't know if this really counts as a made-it... because I didn't do all that much lol but Michaels had these for 40% off and I stacked my teacher discount (15%) on top of that to get this heavy duty desktop carousel for only $24! Plus I had a gift card so technically I spent nothing. #winning

When I got home though I realized that the compartments were way deeper than I anticipated! I did a quick google search and found that other people had used vase fillers or coffee beans so that their pens and pencils stood up and at the correct height.

I bought 3 bags of clear vase fillers from Dollarama to fill the smaller compartments and then I added coffee beans to the large compartment in the middle so my Mr. Sketch markers were standing and at the right height. If you don't like coffee you can use just vase fillers but the coffee beans smell SO GOOD.

I also cut up some felt and added that to line the bottom of the drawers.


Then I made some simple labels to go in the label holders to show what's in the drawer.

If you would like the labels (white out, paper clips and erasers) you can download them from google drive by clicking on the image below!


Here's a final look at what I put in the different compartments:


Left to Right, Top to Bottom, Back to Front:

1: Dry Eraser Markers / Chalk Markers, Exacto Knife
2: Scissors, Hole Puncher / Highlighters
3: Highlighters, Mechanical Pencils / Glue Sticks
4: Twistable Pencil Crayons / Flair Pens
6: Black Sharpies /  Sharpie Paint Pens
7: Ruler. Scissors / More Highlighters

Middle Compartment: Mr. Sketch Markers

My teacher table is usually a #hotmessexpress so
I'm hoping this will help me keep my teacher table a little more clutter free!


2016 Teacher Binders

Does rainbow order make anyone else happy?


I'm not going to lie, I'm a decently organized person.
One area I was seriously lacking was organizing my papers though!
I would have teammates come and ask me "Do you have a copy of ___________?" and I would be digging through papers to find it. I knew I had it... I just didn't know where!
(Ok so maybe I'm not so organized after all.. lol)

Anyways I reorganized my binders and gave it pretty labels and tabs so I'm hoping this will help!


Of course the most important is my teacher binder!
I take this with me everywhere I go!


Those rainbow tabs though!
#allthehearteyes #irealizehashtagsdonothingonblogs


The sections I have in my teacher binder are:

- calendars
- planning
- curriculum
- general info
- pd & meetings
- misc.
- masters

I love having 2 page spread calendars so I have lots of space to write down important dates.


This page is in my "masters" section and I make a copy each week and plan out my to-do list for each day! I write them in order of importance (like if I need it for period 1 on Tuesday I write it FIRST on Tuesday morning or Monday after school.


Do you use a teacher planner? What does yours look like?

* EDIT *

By request, I've added the binder covers, spines and printables for my 2016-2017 teacher planner to my TPT store. You can click on the image below if you're interested!


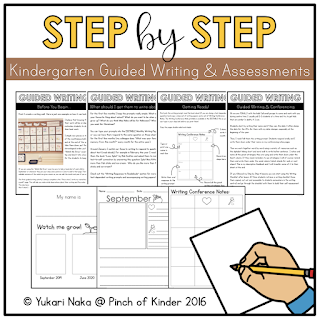
Kindergarten Writing Bundle

This one was a labour of love and I'm so happy for it to be done and ready to go for the coming school year!


I struggled with teaching writing to my Kindergarten kids the first two years.  This year I finally felt like I found my groove! I included all of my tips and favourite lessons for teaching writing, my writing bulletin board cards, information on how I run guided writing and all the printables you need for it!

I hope you love it as much as I do! And if you struggle with teaching writing I hope this will make it more fun for you and your kids!

Here's a preview of some of what's inside each one!


Closet Labels

Another project I finished off was my closest organization!

I have a walk in closet with build in shelves, but until this summer I had a few random bins and lots of clothes just thrown on the shelves...

So I rounded up some bins (I already had most of these on hand but had to buy a couple more so that I had a uniform look. The white bins are from Dollarama and the clear bins are from Home Depot) added some labels and threw my clothes in the appropriate bin!


I just used double sided tape to attach the labels to the bins. It worked like a charm!


My favourite label by far... HA!


I do have 1 pair of "athletic pants" that I keep in there for school "sports days" like the Terry Fox Run or Play Day... but other than that this bin is full of leggings lol

Phew that was a lot! I hope you were able to take away an idea from this post! Which made-it did you enjoy seeing the most?

Click on the image below to read more Monday Made It posts or to link up with your own!


Happy Monday!


15

RTI: Number Intervention Mini Books

Hi guys!

Today I wanted to share a little bit about how I assess and create guided groups for math at the beginning of the year.

During the first two weeks of school I try to pull all of my students one by one and do a beginning of the year number sense assessment with them. This allows me to find out what they already know and helps me plan my whole group instruction, centre activities and guided groups.

The skills I assess are oral counting, number identification, ordering numbers and creating numbers.

I make a copy of the sheet below for each of my students:


You can download this assessment recording sheet (the expectation numbers co-inside with the new Ontario Kindergarten document but there is a version without the numbers as well in the file) by clicking on the image below:


Then I make up a master guided group chart like this:


(These are in the free download above as well)

I write the students name in the column or box if the student needs practice with that skill. Then whenever I meet with them to practice that skill I put a checkmark beside their name. If I observe that they have mastered the skill I highlight their name.

Then each week I pop the (SK) kids I haven't met with for each skill into my guided math planner like this:

{Names are made up and just meant to be an example of what it could look like}

I only meet with the SK's for guided math at the beginning of the year. Although I assess the JK's as well, I try to have them learn their numbers and number concepts through play and whole group lessons before I pull them for guided math.

So now that you're ready to meet with your groups, what should you do?

I like to work on number intervention booklets with them.
Although I am not the biggest fan of worksheets I tried to make these fun and as interactive as possible! I also like that they have something to take home to their parents to build that home-school connection and to encourage them to practice their numbers at home too.

Ok so here is how I use these booklets:

1. Introduce the Focus Number

I hand out the booklets and have the students write their names on the line.
Then I say "Hands up if you can tell me what number we will be learning about today?" If they are struggling remind them to count the dots in the ten-frame to help them.


T: That's right! Today we are learning about the number one! First, we are going to practice printing the number one. Let's sing the number one song to help us remember how to print it properly!

2. Print the Number

I sing this number formation song by Dr. Jean and demonstrate on a whiteboard. Then I say "Ok now pick up your pencil and practice as we sing the song!"


At the bottom I have them print the number we are working on in the blank spot and then I have one of the students volunteer to read the numbers from left to right while pointing to each number.

3. Highlight/Circle the Number

Next we work on number identification and matching by looking for and either highlighting or circling the focus number.

My kids love using highlighters (because I only let them use them during guided groups.. so it's a novelty!) but I know these "Find & Highlight" pages use a lot of ink...


so sometimes we switch it up and use "Find & Circle"! Same concept and again I let them choose a Mr. Sketch marker (again I make a big deal out of this, they are usually JUST FOR ME). They love circling and then smelling their paper ;)


4. Count the Items

On this page I have the students look at the pictures on the right and see how many of that item they can find in the box on the left.  If the number counted matches the focus number the box gets a checkmark. If not the box gets an X.

I usually have the kids count and put a thumbs up or down by their heart for each picture. This way I can quickly assess their 1:1 correspondence. Then I might say "Anna you are right! There is one dog house in the picture. Can you point to the dog house for me?" or "Jacob, you are right! There is more than one cloud in the picture. Can you tell me how many clouds there are? How did you find that out?" etc.


5. Build the Number

At the end is a little extra incentive. My kids love stickers (and really what kid doesn't?). I always have a variety of stickers on hand but I really try to find out what my intervention kids love so that it motivates them to work with me more! (I'm not above bribing!!)

For example the kids in my group loved Shopkins, Minions and Frozen so I went to Walmart and got those stickers to add to my stash!

For this I hand them a sheet of small stickers and have them build the focus number with stickers. 


Each group takes about 10-15 minutes.

I have these mini books in my TPT store. If you click on the preview you can download "My Number 1 Mini Book" for free! Click on the image below to download the preview!


I hope this post helps gave you some ideas on how to assess, plan and implement early number sense intervention!

0

Name Activities for Pre-K & Kindergarten

Hey friends!

Today I wanted to share some name activities that I use at the beginning of the year.
I teach JK/SK (which is Pre-K/K for my American friends) so most JK students and some SK students still need lots of practice learning to write their names at the beginning of the year!

During the first week of school I assess their ability to print their name by having each student complete this sheet. This will also be the first piece that goes up on the writing wall.


I pull small groups to complete this sheet and take note of the students who still need practice printing their names.

Want this writing sheet? I have included the September for the years 2021-2025 for free in the download below! Click here or on the image below to download it for free!


If you want all of the months from August to June (some educators like to do this every month for their JK students as their writing portfolio) you can find that by clicking here or on the image below:


Then I create a name bag for each student who needs practice printing their name. I

 introduce their name bag to them in a guided group so they can learn the components. Then I often have volunteers or student helpers work with them through out the year!


I put the pieces in an extra large freezer bag and store them in a bin.


One activity I include is this letter matching name card.  I have the students say the letter, find the matching letter and place it in the box underneath it. I make mine out of bottle caps of plastic water bottles but you can also use magnetic letters as well!

I put the bottle caps in a small snack size ziplock bag so that they are not swimming in the extra large freezer bag!


Here is another option for these matching cards. I write each letter on a clothes pin and have the students find and clip each letter. This one is great for fine motor as well!

I often start with the bottle caps and switch them out for the clothes pin after a month or so.


I also print these tracing sheets double-sided and laminate them.

On the top I have the students trace the letter with their finger while saying their name in the right order. 

On the bottom I have them print the letters with a dry-erase marker.


On the back I have them print their name one more time and then print their name on their own.

I also take pictures of each student during the first week of school and make these play dough mats!
I type the student's name and insert their picture at the top right corner so that they can find their name easily. I leave these out at the play dough centre for the first month or so. For these, I make one for every student in the class.

You can use these with wikki sticks, small beads or any other small loose parts as well!


You can download templates to make your own name bag and play dough mats by downloading the freebie below!


I use the same picture to create name cards for the word wall for each student.

They look like this:


You can make your own in PowerPoint by downloading the file below!


I make my photos 2.9 x 3.2 cm and with a black border and resize the name depending on the length.
The font I used in the photo is KG Primary Penmanship.

Need more ideas for helping your students learn their names?
Come visit my NAMES Pinterest board!


I hope you were able to grab some ideas for teaching students their names at the beginning of the year! What fun activities do you do to reinforce their names?
6